Just look at the pics if you'd like!
Every so often, the inevitable happens: one of my nails (after growing on its merry little way for ages) just snaps off. I'd like to say that it snaps off on its own volition, but the fact of the matter is, nine times out of ten it's as a result of my own (blatant) stupidity. Case in point, as I mentioned in the comments to Flinty's Emergency Nubbinization post, I recently broke the nail on my index finger just two short breaths before I asked my bf to help me open a canister. You'd think I'd learn to be a lady instead of a werewolf and stop attacking things with my claws but no... No such luck. (Shortly thereafter I proceeded to catch my other index nail under a knife. LOL When it rains, it pours, I guess.)
A couple of months back (just before Christmas/winter/non-denominational holiday break, actually) one of my nails broke and I was incredibly saddened by this fact. Normally I'd just do what I assume most of you do: chop my nails and not-so-patiently wait until the day when all was right again. Given that I was about to embark on a holiday, I resorted to drastic measures, which included the purchase of the following: Nailene adhesive nails.

I must admit that after I bought this I started to worry that perhaps the adhesive wouldn't hold up or that something would go terribly wrong and that, at very least I'd end up with mismatched nails over my holiday. With that fear in mind I ended up not using them at all and so they sat in one of my drawers until last week when, as I said, the inevitable happened. This time, I was a little braver.
I am sure that wearing adhesive nails is a bit of a faux pas with nail aficionados but I was really interested in how well these held up. As of Saturday (Feb 13th), the date of this writing, I've been wearing them on both of my index fingers for about a week. In that time, I've cleaned my condo from top to bottom, typed assignments, graded assignments, cooked a turducken and a full spread of fixings for ten people and worked out (among other things). Surprisingly, the adhesive has held up really, really well with no "gapping" or lifting. On top of that, unlike acrylics, they're thin (plastic) so they look *relatively* natural.
Included in this kit are 36 nails of various sizes, a small buffer (emery board type thing) and nail adhesive. I am NOT a fan of nails that are buffed rough (as is so often the case when natural nails are dremelled all to hell when one gets a set of acrylics) so I did not buff my nails prior to adding adhesive. I simply followed the instructions which stated to add adhesive to my nail as well as the back of the falsie and then press firmly. That was it. And actually, when I was done I almost wanted to add them to all of my nails as they looked pretty good.
First Impressions:
All in all, I think this is a decent quick fix solution. It's relatively inexpensive (I paid approximately $14 CAN at one of the more expensive Canadian drug stores) and works well enough if you're simply hoping to keep a manicure intact. My biggest frustration thus far has been the fact that most of the nails supplied were quite wide (relative to the shape of my nail bed) or they were far too slender, which has meant a nail that looks slightly "off" relative to the rest of my nails. If I were to attempt this again I'd probably select a wider falsie but file it down prior to application.
[Edit] Removal and Second Application:
I initially planned a follow-up post to this entry but since I removed and replaced my nails and polish I figured now was as good a time as any to discuss removal. I was pretty reluctant to use these nails because I figured (given my luck) the glue would warp my nail beds or I'd end up with a pretty wicked nail fungus. Don't ask my why I thought this - I just did. I also thought I'd have a heck of a time removing them especially since I'd now worn them for just under two weeks and they still hadn't shown any sign of coming unglued.
So today (the 17th) I sat down with some cotton balls and some pure acetone. In about 20 minutes I managed to dissolve about 7 layers of polish (I was wearing the Bad Kitty manicure and we all know how fun glitter can be) and with slightly more effort, I dissolved the false nails and glue. That was it. No scraping, peeling, prying, nothing. Nails beneath it looked fine and the only side effects were dry hands from the acetone.
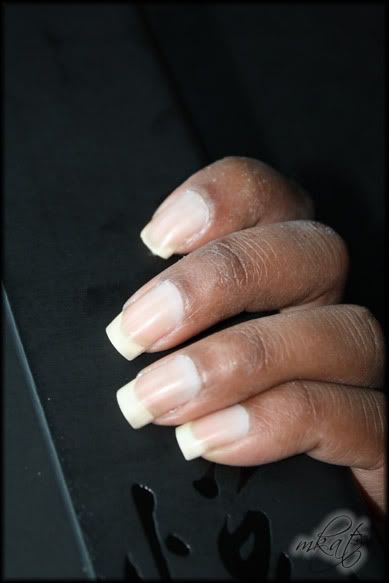
Now, if you've stayed this long to read all of this, here are a couple of pictures of my nails. The first is my short(er) index finger on my left hand. In the first pic all I've done is wash my hands and buff my nails shiny, including the one I plan to cover. In the second pic I've reapplied a new nail to my index finger. It's similar enough to my natural nails though if I were wearing these nails bare I'd whiten my own tips.
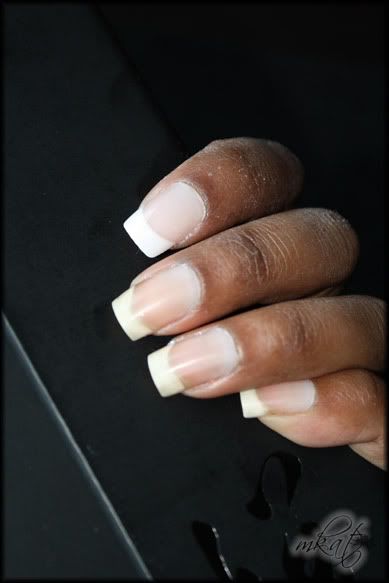
All in all I think these provide a decent, quick-fix solution if you've only got one or two nails to grow out. These nails also take polish really well. The only problem is that the design tends to warp once you remove polish (which means subsequent polish applications will be flawed.)
[Edit] I feel it necessary to point out that there is no info re: animal testing for this company and neither Nailene nor its parent company Pacific World Corporation are signers of the Compact for Safe Cosmetics. This is an admitted detour from my usual animal testing policies.
QOTD: Are there certain polish colours that go better with long nails and others that go better with short or do you wear whatever, whenever?
My personal preference tends to lean toward lighter colours when my nails are long and bright or rich, vampy colours when my nails are short.
-mKat


