I get lots of comments from people wondering how I apply my nail polish so neatly. The answer is: I don't. I drink far too much iced coffee and Diet Mt. Dew to get the perfect application that I long for. I also find myself struggling with some difficult nail polish formulas and brushes so that all adds up to messy application. Even with the perfect formula and brush, I still sometimes get a little messy.
So I cheat. I clean up my polish after I finish my manicure and nobody ever has to know that it looked a little messy before. I'll walk you through what I do to get a picture perfect manicure so you can do the same. I'd like to point out that this tutorial is a remake of my original Nail Polish Clean-Up Tutorial from MakeupAlley.
First off, the supplies. I use 100% acetone. Yes it's drying, but it works so well. You can try using your regular nail polish remover, but nothing works quite as well as straight acetone. I've heard that nail polish thinner also works, but I haven't tried that. I got this acetone at Sally Beauty Supply and it was only a couple bucks. You don't have to use much so the bottle will last you a very long time.

I'm aware that there are conflicting opinions on the potential dangers of using acetone and the amount that is absorbed through your skin. I've read both sides of the story and I choose to use it to clean up. If you prefer not to, you would want to find an alternative to this method of clean up.
Be very careful with straight acetone! It will eat through the finish on your table, laptop, cell phone, anything that's painted, etc. so if you spill it there's no way to work fast enough to get it off before it ruins the finish. It's also highly flammable and volatile so if you smoke or have any type of open flame nearby, you can start a fire. Acetone smells pretty bad, but don't even think of burning a scented candle nearby. You could ignite the fumes and be in for a world of hurt.
You also don't want to pour acetone down your drain or toilet. It can melt the plastic pipes in your sink and I don't know about the water district where you live, but my water company is always sending out flyers on what not to flush down the toilet. They've made it a point to remind homeowners not to flush flammable substances. I've never had to dispose of straight acetone, but I've heard soaking it up with an old rag and letting it evaporate outside is one way. If you have a good way, let me know in the comment section.
You're also going to need some type of brush for the clean up. I've used paintbrushes and eyeshadow brushes and they both work well. The brush you choose is a very individual thing. I used to love my American Painter #6 Filbert (that I bought at JoAnn's Fabrics), but once it started showing signs of wear and tear, I replaced it with the exact brush and the new one didn't work as well. The new one's bristles aren't as stiff as my old favorite so that made me fall out of love with it.
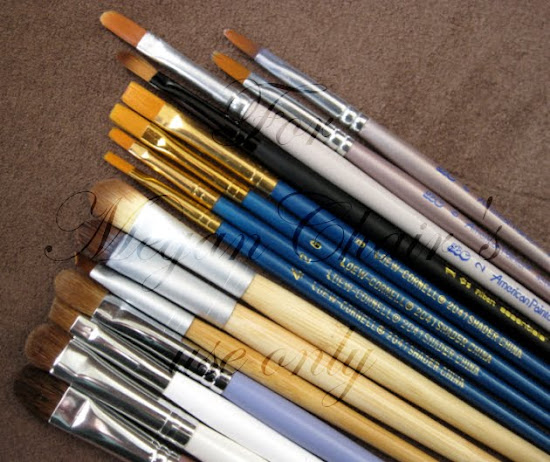
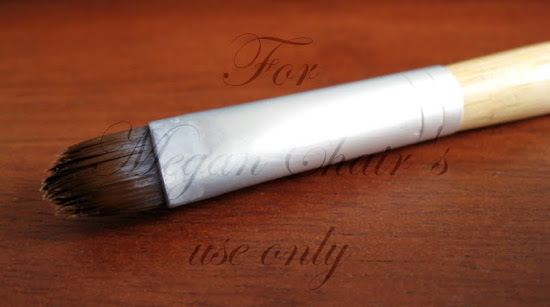
I gathered up all the small brushes around my house and tried out each of them. The one I like best now is my EcoTools eyeshadow brush. I purchased it at Target and originally intended on using it for eyeshadow. I didn't like it for eyeshadow (it's too slippery or something) so I tried it for nail polish clean up and fell in love with it for that purpose. I like how it holds more liquid than the Filbert so I don't have to dip into the acetone as often.
It's starting to show signs of wear and tear so I'm probably going to need a new one soon. See how my EcoTools brush is starting to look a little haggard? I've been using it almost every night for several months now so I've been able to get a lot of use from it. I predict I'll still be able to get a lot more use out of it, though. I've actually been using this one for about a year now and though it still looks pretty ragged, it's holding up quite well.
So now that you've got your brush and acetone, that's all you need! You also might want to have a small glass or ceramic bowl (or cup) to pour the acetone into, but I dip my brush directly into the bottle and have never had a problem. I wouldn't use plastic, though. I once poured acetone into a plastic cup and it ate through the bottom. What a mess that was!
You also might want to have a napkin or paper towel to wipe your brush on once it gets some polish on it. I am lazy and if there's excess polish on my brush, I dip into the acetone a few times to wash it off. I haven't had any problems in the 16 months I've been doing this so I don't think the napkin is necessary.
One important thing about cleaning up is you still want to try to be neat when applying your polish. The neater you are in applying, the easier clean up will be. I always try to create a gap when I'm painting and I try to avoid getting polish on my cuticles. I even try to avoid getting basecoat and topcoat on my cuticles. However, more often than not, I find that I get polish flooding my cuticle at least once per manicure. This clean-up method can fix it, but it takes longer to clean up a flooded cuticle.
Another reason to be neat from the start is that some polishes are a pain in the butt to clean up. Polishes with a lot of pigment will be harder to remove with the acetone. For instance, OPI Smitten With Mittens and OPI Vodka & Caviar were a nightmare to clean up! You don't want to know how long it took me to get my manicure looking halfway decent when I wore those.
Polishes that contain glitter or flakes can also be difficult to clean up. Glitter and flakes don't dissolve in acetone (at least not in the small amount of time you have them in contact on your nails) so a lot of times you'll have a flake or a piece of glitter sticking out along the edge of your gap. I clean these up while my polish is still pretty wet so I can use my clean-up brush to push any stray glitter or flakes to where I want them.
Here's a picture of what can happen when you clean up a flakie polish. I didn't push the flake where I wanted it to be so it just kinda hung out along the edge. It's not very noticeable in real life, but macro shots pick up all the gory details.

With that said, this method works like a charm on creams and jellies. I've also found that it's easier for me to clean up a darker polish. I guess because it's easier to see?
Something else I've noticed that makes clean up easier is maintaining your cuticles. If I slack on using cuticle softener and pushing back my cuticles, it's harder to get a nice clean gap. I use a cuticle softener and gently push my cuticles back about once a week and that seems to help make it easier to clean up.
In my original clean-up tutorial, I mentioned that I put top coat on and wait for my polish to be pretty dry before cleaning up. However, I've noticed that it's much easier to clean up if I do it while my polish is pretty wet and before I put on top coat. After cleaning up, I carefully apply top my top coat. Since my polish is all cleaned up, usually I can apply my top coat neatly. If I go outside the lines a bit, I usually just leave it since it doesn't really show much. If you want, you can clean up the top coat as well with the brush and acetone.
What you see below is my manicure before clean up. You can click on the pictures to make them larger, if you'd like. As you can see, my manicure isn't terrible, but it's not as neat as I'd like. (I used OPI Malaga Wine for this tutorial, by the way.)
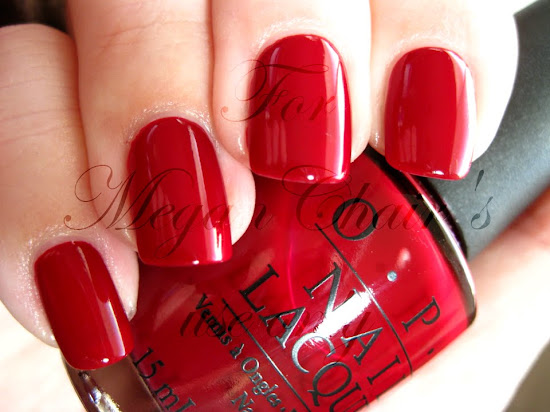

While I'm usually not bad at painting my right hand, my left hand comes out a little messier. There is polish on the skin around my nails and it's just messier in general.

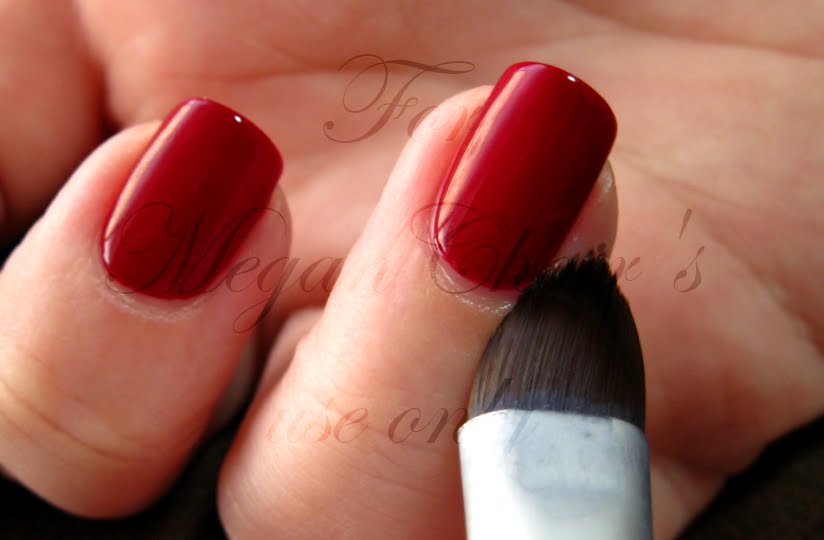
To clean up, you're going to want to dip your brush right into the acetone. Wipe the excess off on the lip of the bottle and then gently sweep away the polish along the sides of your nail until it's as neat as you'd like. When I clean up the sides of my nails, I use my thumb (or my index finger when I'm cleaning up my thumbnail) to gently pull the skin beside each nail out of the way.


You also want to clean up your gap. Gently sweep the brush along the edge of your polish to neaten the edge.


Once you are done with all 10 nails you'll want to apply your top coat. Wait a bit and gently wash and dry your hands. You don't want to be too vigorous since your polish is probably still dentable. It wouldn't be fun to spend all that time on getting a picture perfect manicure only to mess it up washing your hands.
You'll want to apply something for moisture now - either cuticle oil, cream, etc. Just use whatever you usually use for dry hands and cuticles. I apply these while my hands are still a little damp. I've found that these products work better when your hands aren't totally dry.
That's it! This is all I do to clean up. It takes two products and it's very simple. I've gotten much better through practice (at both applying polish and cleaning it up) so you will, too. When I first started cleaning up with a brush and acetone, it would take me about half an hour to do my clean up, but lately it's only been taking 10-15 minutes. It also depends on the type of polish (remember, pigmented polishes take longer), but you get better (and faster) with time. Here are a few close up pictures of the end result:
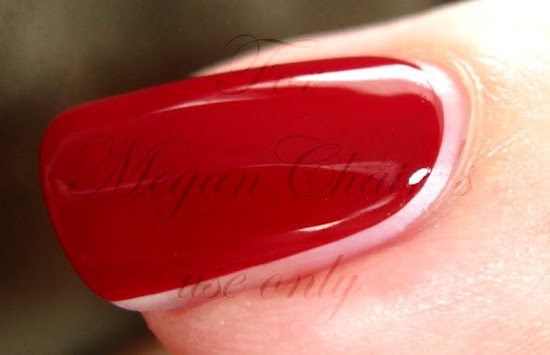
Keep in mind that these pictures were taken with the macro setting so it's really close up and exaggerated. The gap is definitely not as noticeable in real life. Plus, as you get better with painting your nails and cleaning up, you can make your gap even smaller. Mine is about half that size now.

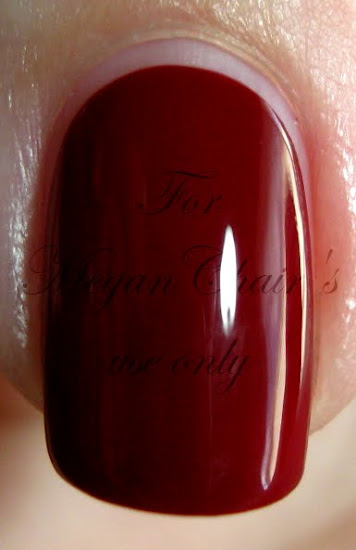
And last, but not least, the overall manicure.


I hope you enjoyed my clean-up tutorial and let me know how it works out for you if you try it!
read more "How To Get That Picture Perfect Manicure"
So I cheat. I clean up my polish after I finish my manicure and nobody ever has to know that it looked a little messy before. I'll walk you through what I do to get a picture perfect manicure so you can do the same. I'd like to point out that this tutorial is a remake of my original Nail Polish Clean-Up Tutorial from MakeupAlley.
First off, the supplies. I use 100% acetone. Yes it's drying, but it works so well. You can try using your regular nail polish remover, but nothing works quite as well as straight acetone. I've heard that nail polish thinner also works, but I haven't tried that. I got this acetone at Sally Beauty Supply and it was only a couple bucks. You don't have to use much so the bottle will last you a very long time.

I'm aware that there are conflicting opinions on the potential dangers of using acetone and the amount that is absorbed through your skin. I've read both sides of the story and I choose to use it to clean up. If you prefer not to, you would want to find an alternative to this method of clean up.
Be very careful with straight acetone! It will eat through the finish on your table, laptop, cell phone, anything that's painted, etc. so if you spill it there's no way to work fast enough to get it off before it ruins the finish. It's also highly flammable and volatile so if you smoke or have any type of open flame nearby, you can start a fire. Acetone smells pretty bad, but don't even think of burning a scented candle nearby. You could ignite the fumes and be in for a world of hurt.
You also don't want to pour acetone down your drain or toilet. It can melt the plastic pipes in your sink and I don't know about the water district where you live, but my water company is always sending out flyers on what not to flush down the toilet. They've made it a point to remind homeowners not to flush flammable substances. I've never had to dispose of straight acetone, but I've heard soaking it up with an old rag and letting it evaporate outside is one way. If you have a good way, let me know in the comment section.
You're also going to need some type of brush for the clean up. I've used paintbrushes and eyeshadow brushes and they both work well. The brush you choose is a very individual thing. I used to love my American Painter #6 Filbert (that I bought at JoAnn's Fabrics), but once it started showing signs of wear and tear, I replaced it with the exact brush and the new one didn't work as well. The new one's bristles aren't as stiff as my old favorite so that made me fall out of love with it.

I gathered up all the small brushes around my house and tried out each of them. The one I like best now is my EcoTools eyeshadow brush. I purchased it at Target and originally intended on using it for eyeshadow. I didn't like it for eyeshadow (it's too slippery or something) so I tried it for nail polish clean up and fell in love with it for that purpose. I like how it holds more liquid than the Filbert so I don't have to dip into the acetone as often.
It's starting to show signs of wear and tear so I'm probably going to need a new one soon. See how my EcoTools brush is starting to look a little haggard? I've been using it almost every night for several months now so I've been able to get a lot of use from it. I predict I'll still be able to get a lot more use out of it, though. I've actually been using this one for about a year now and though it still looks pretty ragged, it's holding up quite well.
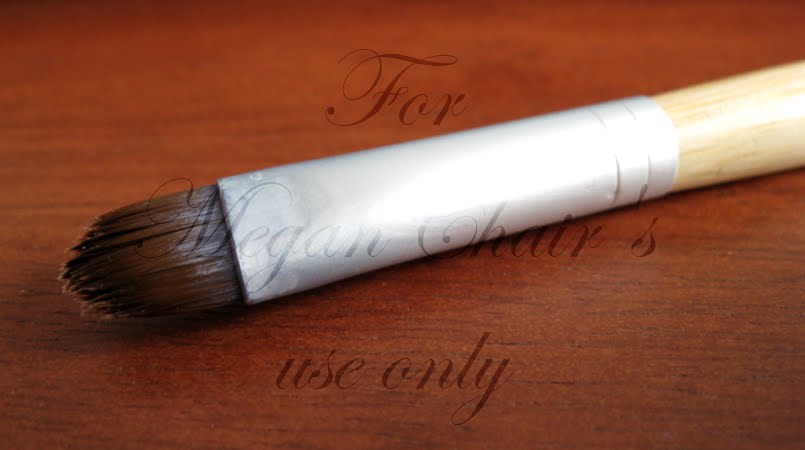
So now that you've got your brush and acetone, that's all you need! You also might want to have a small glass or ceramic bowl (or cup) to pour the acetone into, but I dip my brush directly into the bottle and have never had a problem. I wouldn't use plastic, though. I once poured acetone into a plastic cup and it ate through the bottom. What a mess that was!
You also might want to have a napkin or paper towel to wipe your brush on once it gets some polish on it. I am lazy and if there's excess polish on my brush, I dip into the acetone a few times to wash it off. I haven't had any problems in the 16 months I've been doing this so I don't think the napkin is necessary.
One important thing about cleaning up is you still want to try to be neat when applying your polish. The neater you are in applying, the easier clean up will be. I always try to create a gap when I'm painting and I try to avoid getting polish on my cuticles. I even try to avoid getting basecoat and topcoat on my cuticles. However, more often than not, I find that I get polish flooding my cuticle at least once per manicure. This clean-up method can fix it, but it takes longer to clean up a flooded cuticle.
Another reason to be neat from the start is that some polishes are a pain in the butt to clean up. Polishes with a lot of pigment will be harder to remove with the acetone. For instance, OPI Smitten With Mittens and OPI Vodka & Caviar were a nightmare to clean up! You don't want to know how long it took me to get my manicure looking halfway decent when I wore those.
Polishes that contain glitter or flakes can also be difficult to clean up. Glitter and flakes don't dissolve in acetone (at least not in the small amount of time you have them in contact on your nails) so a lot of times you'll have a flake or a piece of glitter sticking out along the edge of your gap. I clean these up while my polish is still pretty wet so I can use my clean-up brush to push any stray glitter or flakes to where I want them.
Here's a picture of what can happen when you clean up a flakie polish. I didn't push the flake where I wanted it to be so it just kinda hung out along the edge. It's not very noticeable in real life, but macro shots pick up all the gory details.

With that said, this method works like a charm on creams and jellies. I've also found that it's easier for me to clean up a darker polish. I guess because it's easier to see?
Something else I've noticed that makes clean up easier is maintaining your cuticles. If I slack on using cuticle softener and pushing back my cuticles, it's harder to get a nice clean gap. I use a cuticle softener and gently push my cuticles back about once a week and that seems to help make it easier to clean up.
In my original clean-up tutorial, I mentioned that I put top coat on and wait for my polish to be pretty dry before cleaning up. However, I've noticed that it's much easier to clean up if I do it while my polish is pretty wet and before I put on top coat. After cleaning up, I carefully apply top my top coat. Since my polish is all cleaned up, usually I can apply my top coat neatly. If I go outside the lines a bit, I usually just leave it since it doesn't really show much. If you want, you can clean up the top coat as well with the brush and acetone.
What you see below is my manicure before clean up. You can click on the pictures to make them larger, if you'd like. As you can see, my manicure isn't terrible, but it's not as neat as I'd like. (I used OPI Malaga Wine for this tutorial, by the way.)


While I'm usually not bad at painting my right hand, my left hand comes out a little messier. There is polish on the skin around my nails and it's just messier in general.

To clean up, you're going to want to dip your brush right into the acetone. Wipe the excess off on the lip of the bottle and then gently sweep away the polish along the sides of your nail until it's as neat as you'd like. When I clean up the sides of my nails, I use my thumb (or my index finger when I'm cleaning up my thumbnail) to gently pull the skin beside each nail out of the way.


You also want to clean up your gap. Gently sweep the brush along the edge of your polish to neaten the edge.

Once you are done with all 10 nails you'll want to apply your top coat. Wait a bit and gently wash and dry your hands. You don't want to be too vigorous since your polish is probably still dentable. It wouldn't be fun to spend all that time on getting a picture perfect manicure only to mess it up washing your hands.
You'll want to apply something for moisture now - either cuticle oil, cream, etc. Just use whatever you usually use for dry hands and cuticles. I apply these while my hands are still a little damp. I've found that these products work better when your hands aren't totally dry.
That's it! This is all I do to clean up. It takes two products and it's very simple. I've gotten much better through practice (at both applying polish and cleaning it up) so you will, too. When I first started cleaning up with a brush and acetone, it would take me about half an hour to do my clean up, but lately it's only been taking 10-15 minutes. It also depends on the type of polish (remember, pigmented polishes take longer), but you get better (and faster) with time. Here are a few close up pictures of the end result:
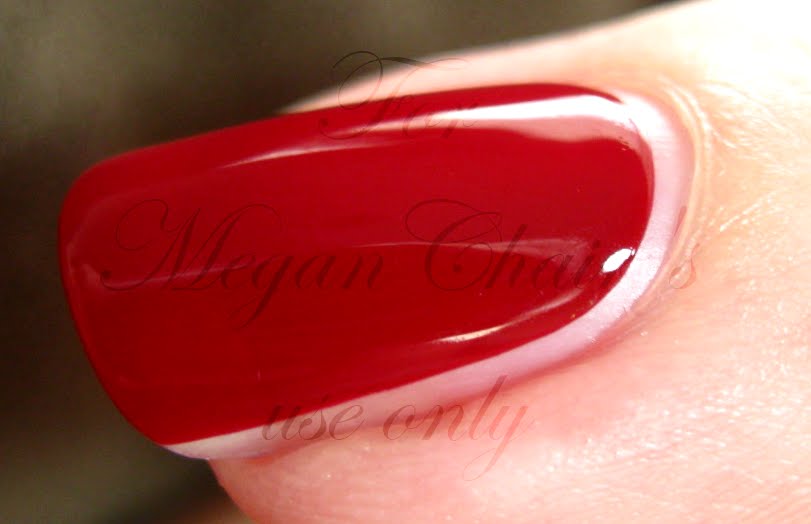
Keep in mind that these pictures were taken with the macro setting so it's really close up and exaggerated. The gap is definitely not as noticeable in real life. Plus, as you get better with painting your nails and cleaning up, you can make your gap even smaller. Mine is about half that size now.


And last, but not least, the overall manicure.


I hope you enjoyed my clean-up tutorial and let me know how it works out for you if you try it!